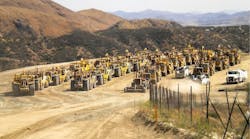
Between the constant grinding and daily pounding, a concrete drill certainly has its work cut out for it. Fortunately, these units are built tough to handle demanding tasks on the jobsite. And while they’re also designed to be virtually maintenance-free, they still need care and attention on a regular basis. Here are some maintenance tasks that are simple, take minimal time and can prevent expensive repairs and replacement.
A Well-Oiled Machine
A concrete drill requires oil, and a lack of lubrication can cause a work slowdown or stoppage. This may be fixed by pouring oil directly onto the motor. If that doesn’t work, the entire machine will need to be disassembled, oiled, and reassembled before work can continue. To avoid this time-draining procedure, fill the oiler as often as twice a day, depending on model and workload. And be sure only rock drill oil is used. Other lubricants are too light for concrete drills and using them will cause the oil to burn.
Clearing Things Up
Because the drill uses oil, take notice if the oiler always seems full. This may indicate a clog in the oiler or air hose. Check the air inlet screen and, if it appears clogged or dirty, brush off excess dirt or debris.
All about Hoses
This is also a good time to ensure the size of the air hose is correct. Using a hose that is too small won’t damage the drill, but it will affect its efficiency and performance. Hose length also impacts the amount and pressure of air reaching the drill, so it’s important not to use an excessive length. A longer hose creates more friction, which reduces air pressure.
Power Up
Another reason the drill may not be receiving sufficient air could be that the air compressor is too small. Most drills require 100 cfm, 200 cfm for a two-gang unit, and so on. And be aware that changes in elevation will have an effect on the cfm level.
Try This On For Size
Speaking of size, the bushing size will vary based on the size of the bit being used. The bushings centralize the bit and produce a cleaner hole, making them an important part of the drill.
Prevent Breakage
Trunnion bolts are another important part of the drill, as they secure the latch that holds in the bit. If the drill is not being used properly, these bolts can easily break. Replacement is costly and so is the downtime the drill experiences while it waits for repair. Running the drill motor only when the bit is tight against the concrete and drilling into the slab will help prevent breakage. Ensuring the motor is shut off when exiting a hole and moving to the next spot will help prevent "dry firing," a redirection in pressure that can cause the bolts to break.
Sit Tight
Other bolts to watch for breakage are the thru bolts on the motor. The hammering motion of the drill can shake them loose at times, and a loose bolt will cause a tighter one to break. However, it is possible to tighten some bolts too much, which will restrict the bit’s movement. Refer to the owner’s manual for specific areas where this problem is common and be sure the bolts are tight, but not so tight that movement is hampered.
End the Day the Right Way
When the drill is finished for the day, don’t put it away without taking care of the following tasks. First, clean off any dust produced by the drill using an air hose or pressure washer. If dust has clogged the drill bit, simply insert a wire into the drill tip to clean it out. Finally, grease all of the fittings and guide wheels, if applicable.
Time Off
If the drill is taking a few days or an entire season off, a few steps need to be taken to prevent rusting. First, disconnect the hose from the drill motor, and then pour a small amount of rock drill oil directly into the motor to lubricate the working parts. Next, run the motor at half-throttle to coat the interior parts. Finally, drain all condensation from the machine’s filters, and cover the drill with a tarp if storing outside.
Back to Work
When it’s time for the drill to get back on the jobsite, a few things must first be checked. For starters, ensure the oiler is full, the bolts are tight, and the motor is free of moisture contamination. If the unit has wheels, check the tire pressure. Blow out any dirt or debris that may have accumulated in the hose that runs between the drill and the compressor. When these tasks have been completed, the drill is ready to get back to the daily grind.
Easy Upkeep
A few basic checks, a bit of common sense and a small amount of care can go a long way in getting the most out of a concrete drill. And that’s not too much to ask for a machine that works so hard day after day.
(Randy Stevens is National Sales Manager for E-Z Drill.)


